Yoast is a very powerful WordPress plugin that makes bloggers life way too easy. It helps optimize the content by suggesting significant updates to the content you have written and make it ready for the search engines. Within this post, we will see a trick to use the Yoast plugin for Blogger and non-WordPress platforms. I have made this post a little descriptive covering all aspects so that everyone gets it.
Yoast is fantastic, no plugin good as this is!
Yoast is a search optimization plugin and exclusively available on the WordPress blogging platform. I was amazed to see how easy it makes the life of a blogger by optimizing the content. Just in case you want to know about the features offered by Yoast have a look here. I wished something like it was also available for the Blogger platform. I tried looking for the information for the same, but couldn't locate any.
Google's Blogger platform is my first love in terms of simplicity and features it offered since the beginning. But not able to use a Yoast like plugin on the Blogger is quite upsetting. Also, changing the blogging platform just to use Yoast didn't sound a wise decision. Though, I realize this could be worked around. We just need to validate the content in Yoast regardless of the platform on which it exists.
Let me explain you this in more detail, but before that let's understand how Yoast plugin works.
Generally, webmasters perform a couple of checks to ensure our blog post is search engine friendly. Similarly, Yoast analyzes your blog-post content and based on the content written inside a post, it gives you suggestions to improve it.
Meaning Yoast checks your content line by line and word by word. Based on this, it displays notifications at the bottom of the post. These notifications basically highlight several SEO related suggestions in bullet points that should be applied to the blog post. This can be done manually also, but it takes a lot of efforts and could be a tedious job.
Yoast uses several colors for bullet points in notifications. Red bullet point means that you have done something terribly wrong in the blog post and need to be corrected. Orange indicates that content is fine, but still, it can be improved for the best result. Green bullet point represents that you have done a good job optimizing the content.
Limitations with the Yoast plugin
Now, in order to use the Yoast plugin on your blog, the prime requirement is that you should have a WordPress blog. I dug the internet for many days in search of the alternative. It seems that there is no alternative but that you must have a WordPress blog to use the Yoast plugin.
This leaves you two choices. i.e either you buy hosting space and install the WordPress or self-host your blog which will save your hosting cost. Buying hosting space is out of the question as we don't want to invest our money just for the sake of using a plugin. Another way is the self-hosted blog. But then, you will need to have a sound level of knowledge to manage the blog and install the necessary software on the laptop/pc.
The solution to use the Yoast plugin for Blogger and non-WordPress platforms
Now the solution I'm going to share would overcome all the problems we discussed above. So the first thing first. You will have to find out a free WordPress hosting service provider to host your dummy blog. There are a couple of sites which provide free WordPress hosting.
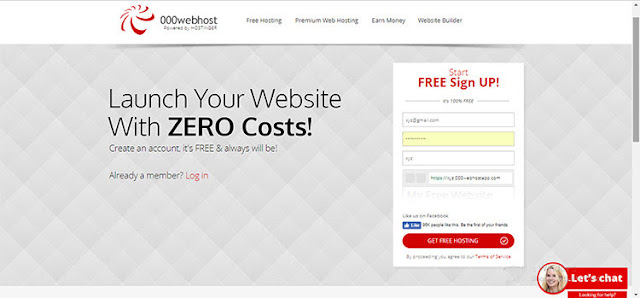
I find 000webhost the most popular and renowned hosting service provider than the rest of the sites. They will let you install the latest WordPress software and provide great support to keep your WordPress software and plugins to the latest version. They provide hosting space totally free of cost.
Now let's come back to our main task, installing the Yoast plugin. Once you are on 000webhost you will have to register an account to get the free hosting space. While registering you will be asked to enter an email address, password and domain name for your blog. Enter these details and create a 000webhost account.
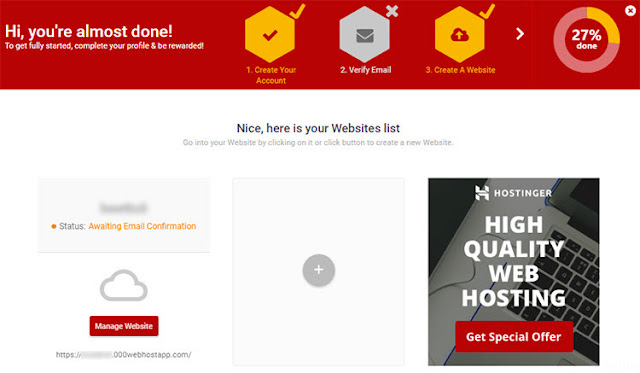
On successful registration, you will be redirected to the member's area. You will be asked to verify your email before you proceed to create a website. Just verify it by clicking on the link you have received in your mailbox.
On successful registration, you will be redirected to the member's area. You will be asked to verify your email before you proceed to create a website. Just verify it by clicking on the link you have received in your mailbox.
Once verification is done, your website will be active and you will be able to do a further modification to the website. Click on the Manage Website button as indicated in below screenshot.
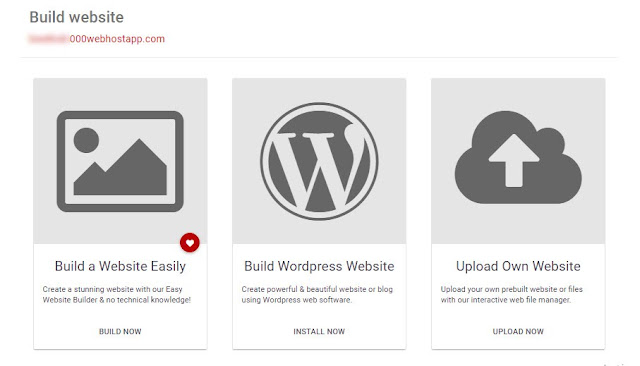
Now to install WordPress software, click on the Install Now button just below the text Build WordPress Website as indicated in below screenshot.
The next process requires to create a WordPress account by providing username and password for managing WordPress blog.
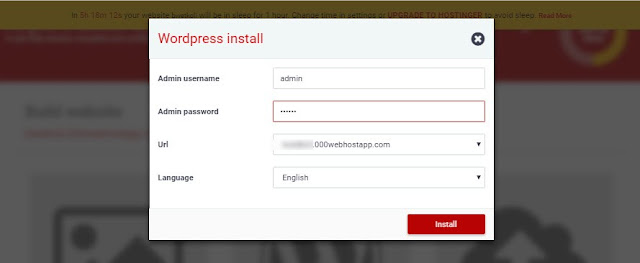
After clicking on the install button, WordPress software will start to get installed. It will take 1-2 minutes. After installation click on Go to Configuration Page. A new page will open and will ask to enter credentials for the WordPress blog.
On successful login, you will be redirected to the WordPress dashboard page as like below picture.
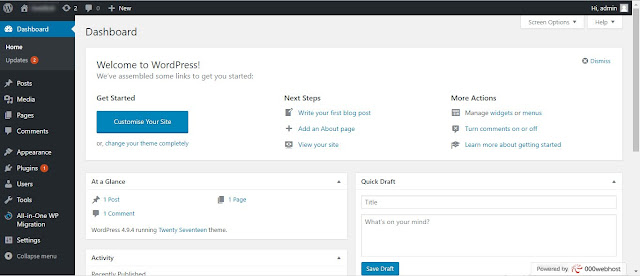
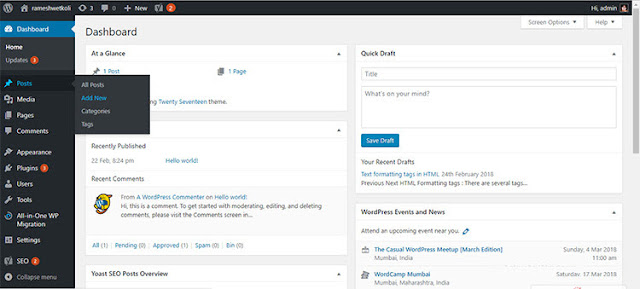
Now in the above picture, you will see Plugins option in the left sidebar. Move your mouse over it and select Add New link from the options that have been poped-up. Click on the Popular tab and you will see Yoast in the top results. Click on the Install Now button to install the Yoast plugin. After installation, you will have to click on the Activate button from the same window to activate the plugin on your website.
With this step our installation process is complete. Now to use the Yoast plugin for Blogger/ non-WordPress platforms follow the simple trick mentioned below. I am going to demonstrate this for a Blogger blog. Keep the WordPress blog open in the one tab of your browser and open the Blogger blog in a different tab.
Let's say we have completed writing the Blogger blog post and want to optimize it for the SEO. Now, since we don't have Yoast plugin on the Blogger, we are going to copy the blog content from Blogger and optimize it on WordPress.
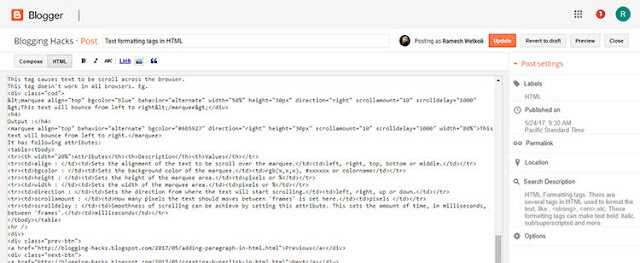
We will copy the HTML code which is been generated at the backend to retain the formatting of a blog post. Hence after writing the complete blog post, click on the HTML tab to view the HTML code of the blog post. See below picture for more information.
Let's say we have completed writing the Blogger blog post and want to optimize it for the SEO. Now, since we don't have Yoast plugin on the Blogger, we are going to copy the blog content from Blogger and optimize it on WordPress.
We will copy the HTML code which is been generated at the backend to retain the formatting of a blog post. Hence after writing the complete blog post, click on the HTML tab to view the HTML code of the blog post. See below picture for more information.
It will open a post editor window. Now click on the Text tab in the upper right corner of the post editor box. Paste the copied content in the textbox. Similarly, copy the blog post title from Blogger to WordPress.
After this process, scroll down a bit and locate Yoast SEO box below the post editor. Here, enter focus keyword of your post to get the best result from your SEO strategy. See the below example.
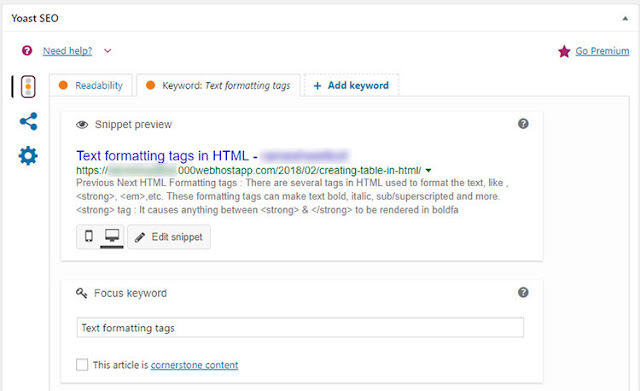
If you scrolled a bit more in your WordPress window, you will see an analysis report generated by Yoast plugin. Red points indicate that these changes need to be made in your blog post to make it SEO compliant. Orange points indicate areas of improvement to make it even better. Green ones are just fine and no need to worry about it.
Once you have made all the changes and converted as many red and orange points into the green one, you have done optimizing work for your blog post.
After this process, you will have to click on the text tab again to get the updated HTML code for the revised content. Copy the entire text and paste it into the HTML tab of your Blogger post.
With this trick, you will have Yoast at your feet and you would be able to do the SEO task with more convenience. Since using Yoast is time savvy, you will be more productive and your posts will have more weight from an SEO point of view. Happy optimizing!
Once you have made all the changes and converted as many red and orange points into the green one, you have done optimizing work for your blog post.
After this process, you will have to click on the text tab again to get the updated HTML code for the revised content. Copy the entire text and paste it into the HTML tab of your Blogger post.
Conclusion:
This is how you will be able to use the Yoast plugin for Blogger / non-Wordpress platforms which do not support Yoast plugin. The procedure requires a little effort from that of the WordPress users. But once you have set up the WordPress blog as we discussed, you will only have to do the copy paste work.With this trick, you will have Yoast at your feet and you would be able to do the SEO task with more convenience. Since using Yoast is time savvy, you will be more productive and your posts will have more weight from an SEO point of view. Happy optimizing!
Please do not forget to like, share and comment and share your love. 😊